 by Adam Friedman
One (S)Hell of a Format. The first event of the Majestix Open Series is about to happen at the end of this month, and I’m going to be there. There’s just one problem. The format has too many sweet options. Even with a rather sizable Ban List there’s a lot going on in terms of possible strategies, so what I like to focus on are core elements of possible builds that can be adapted or adjusted for various purposes or match-ups or even combined with different elements to try and cover holes or create additional synergies.
In some cases it takes the entire 300 points to make synergies worth utilizing, or close enough to not be much different. However sometimes strong strategies worth leaning on as the core of your build don’t have to take up the entirety of your team. I refer to these core elements as “Shells.” They are not complete teams, some of them don’t even account for more than half of the team. In many cases there are similar enough figures or effects to fill similar roles that two teams utilizing the same shell may not feel like the same team despite having five, six, or even ten elements in common. I’m going to go through and list some shells I think are likely to perform very well in the ROC age event and talk a bit about why I think they are good, and what they can add to teams that have the points for them.
Quick IDs: 42-56 pts
21 Lawyer x7
21-35 ID card x7 (5 per normal/teacher ID, 3 per student)
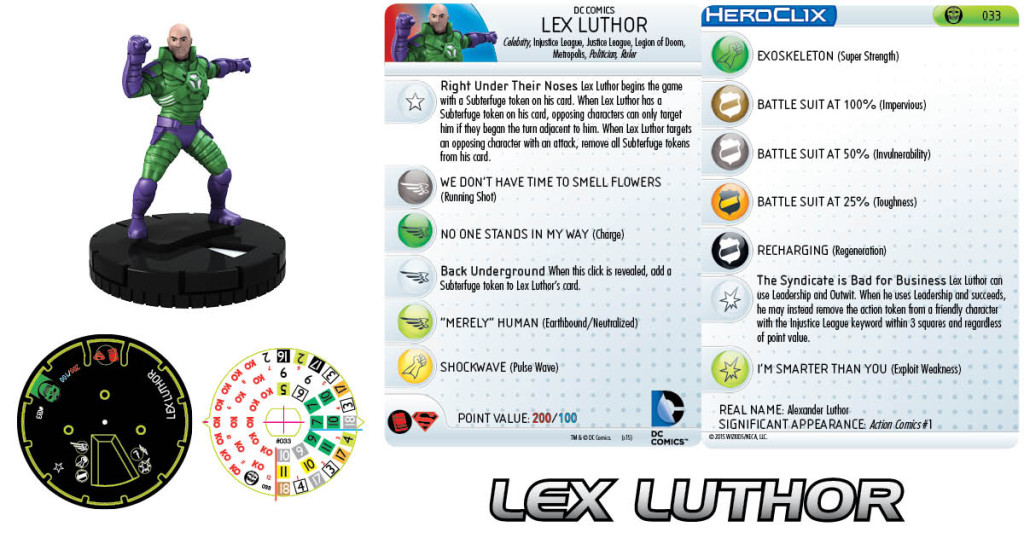
Normally when looking at teams it can be hard to figure out how to up your ID count without spending too much. The 3pt bystanders from Fear Itself fill that hole extremely well. For 56 pts that don’t break theme even a one man army like Subterfuge Luthor can have nearly a full suite of ID characters to call in. Obviously this shell scales down as needed since every character already on your team means one less Lawyer necessary to increase your main force count.
Same Story, Different Day:
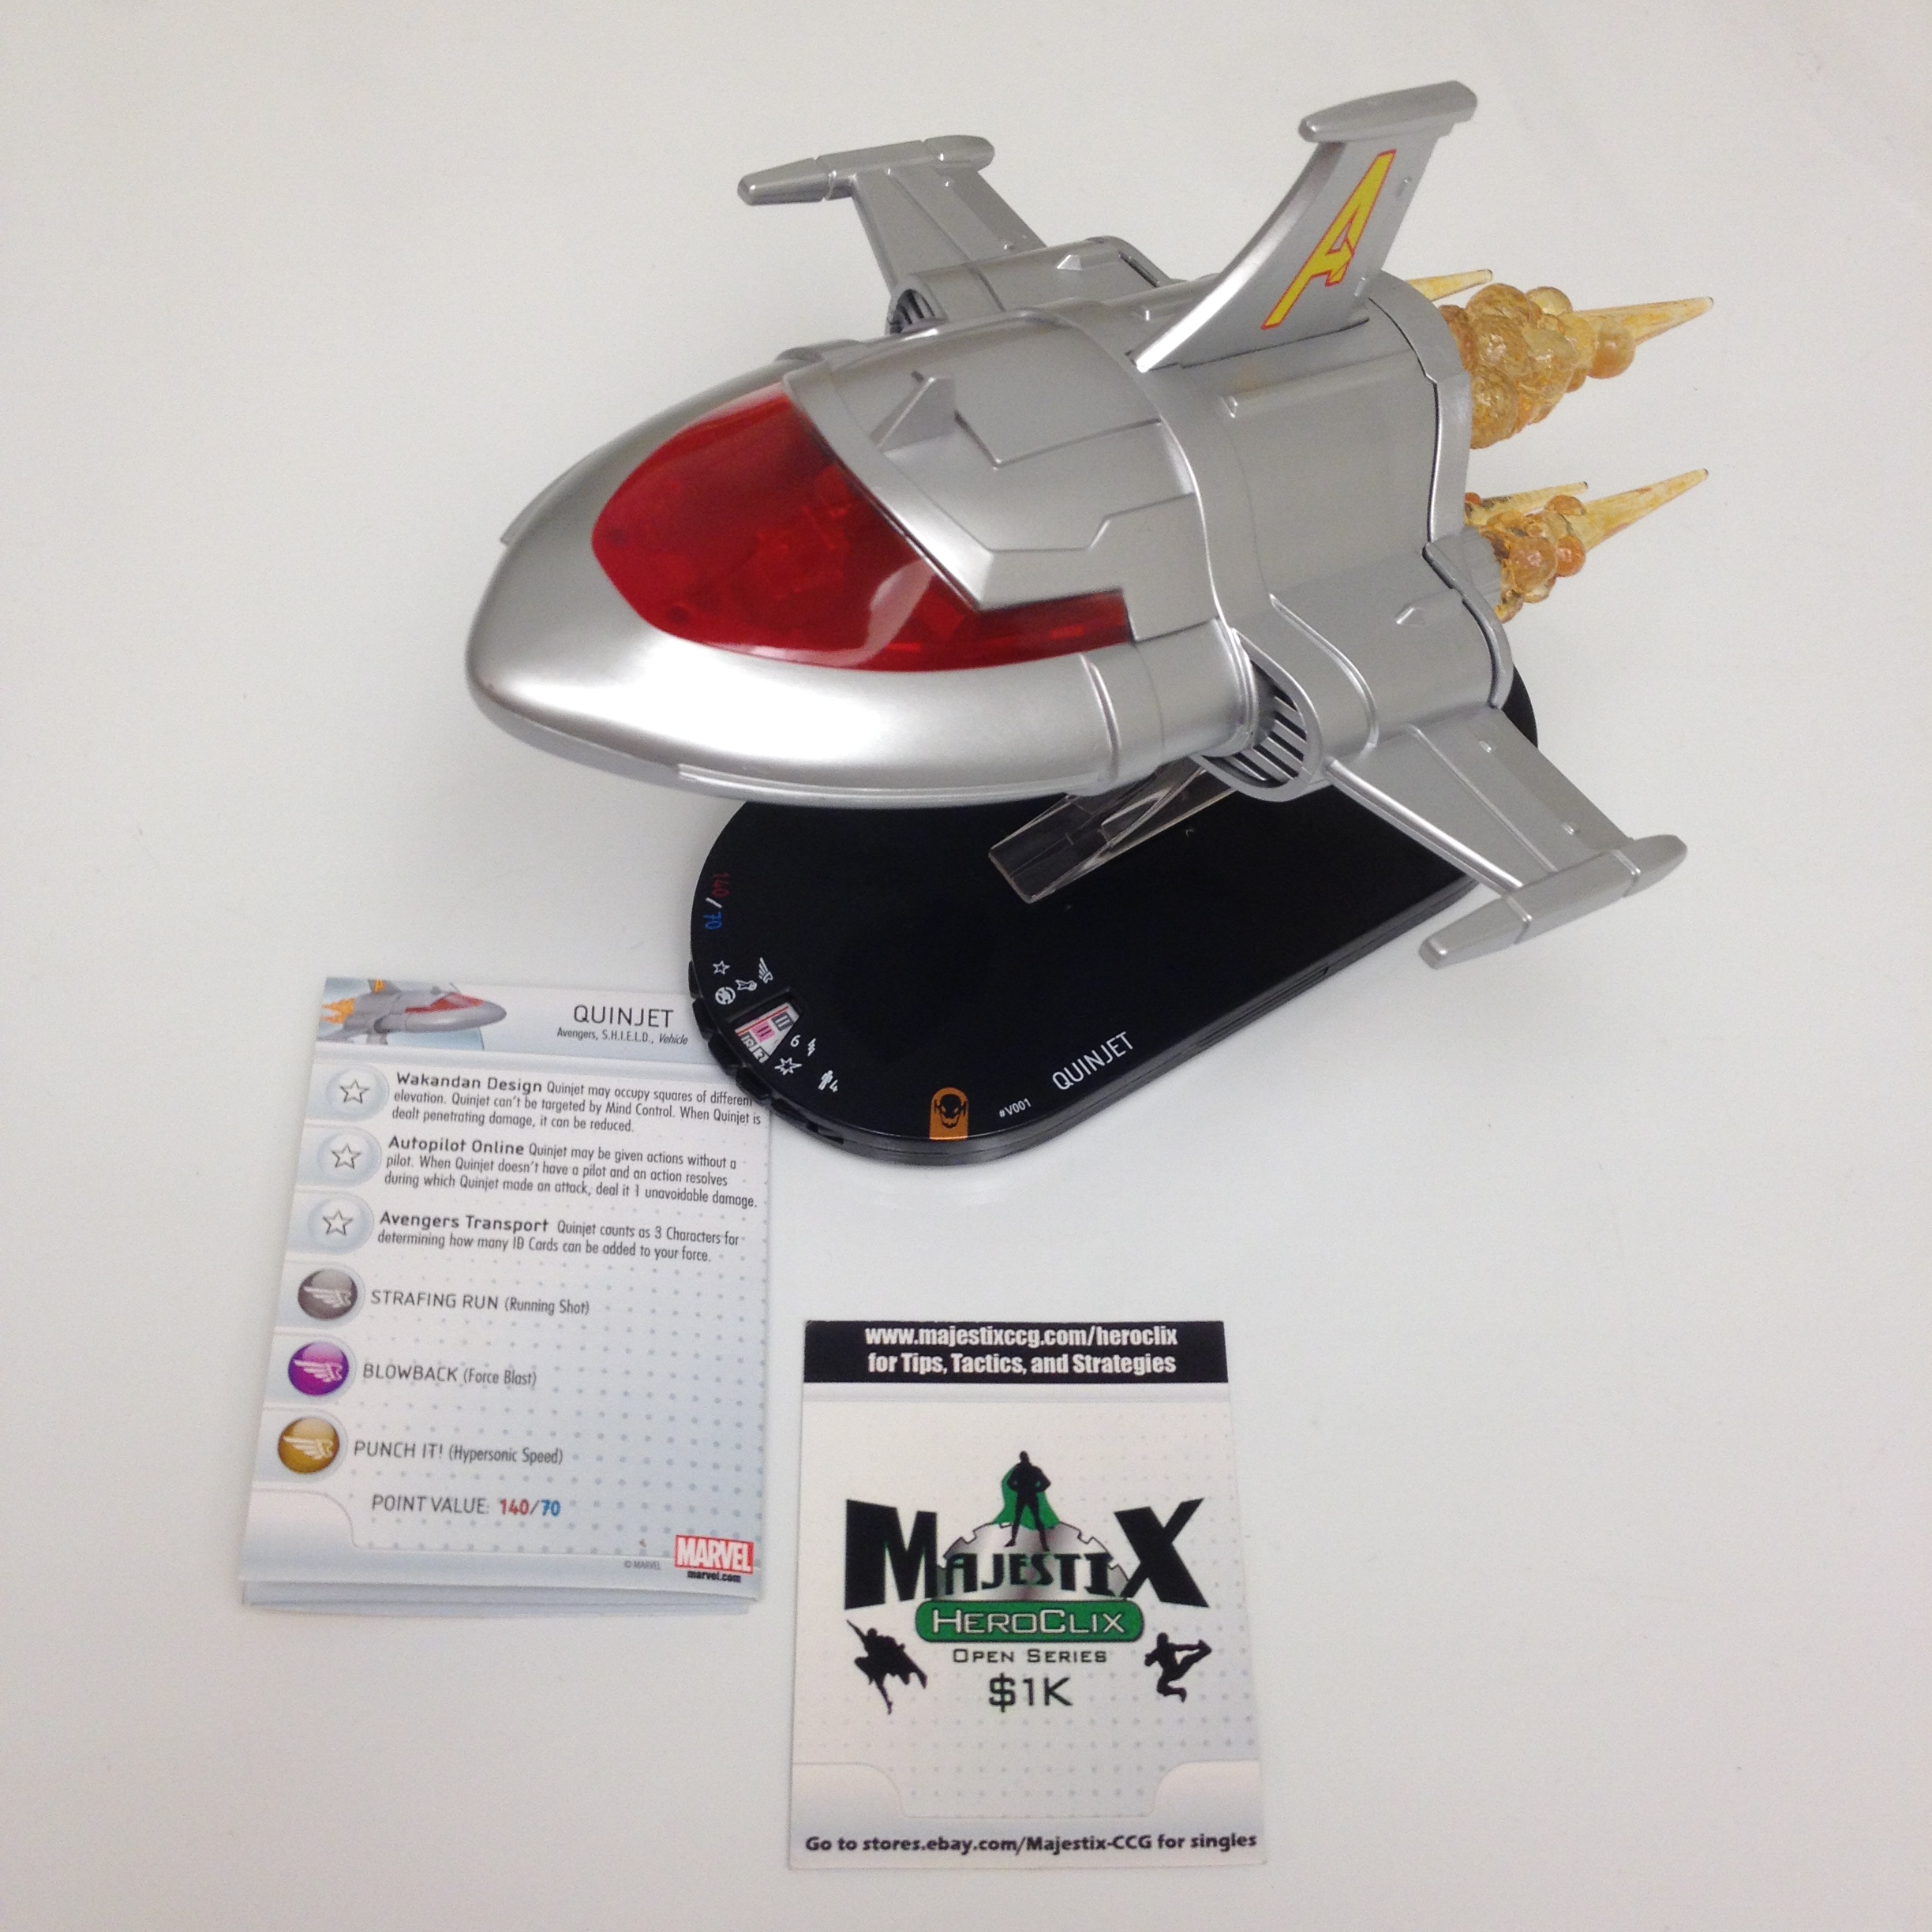
75 Quinjet + Resource
5 Hank Pym ID
5 Atom ID
5 Ms. Marvel ID
5 Hawkeye ID
5 Ronin ID
5 Shield Level 7 ID
While you’ll need to find 3 other figures to play, this setup for 105 points allows a staggering amount of value. The first three IDs all have retaliator options at 15 pts, which gives the jet a far greater than 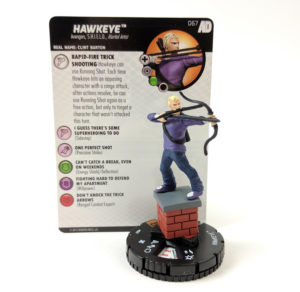 normal ability to pop out realboy threats at remarkably low costs, allowing them to re-spin and go for a larger realboy immediately while still getting value. Hawkeye Ronin and Level 7 each allow you to sideline a copy of ADW chase Hawkeye, who is best known for being able to attack every opposing character in a single action. Normally players can only threaten to do this about once per game if they don’t main-force him. But due to his real name and keywords, it is possible to bring out this piece consecutively, mowing down small pieces and putting chinks into more important figures’ armor. Assuming enough characters on your force (and taking a page out of the Quick IDs shell, it’s obvious that getting a full brace of 9 IDs can be done quite cheaply) there is still room for old Quinjet staples such as Nick Fury, Nightwing, Nova, or SR Iron Man to pilot the Jet. There are also some new goodies with XXM releasing, such as SR Iceman, Chase Jean Grey, and SR Wolverine off their respective IDs.
Librarians Elite:
75-90 Shredder Elites
20 Splitlip
30 Book of the Skull
Splitlip and Book have always gone together like peanut butter and chocolate.  But Shredders bring a great tool to the table. See, Book’s D6 rolls for hammer-wielders triggers based on them causing opposing figures to take damage. But it doesn’t specify that this must be combat damage. Thus Shredders who have hammers can quickly and easily turn through the Book to get good powers and pluses to hand out to your empowered each turn. A Shredder who Sidesteps in next to 3 opposing characters gets to roll 3 dice, and if any of them were bystanders or on their last click you get to automatically add 3 to the amount you click the resource. Since you can choose to do this early in the turn or late, this allows Shredders with a book to consistently utilize the best clicks by quickly spinning off of its early dial and onto its late dial.
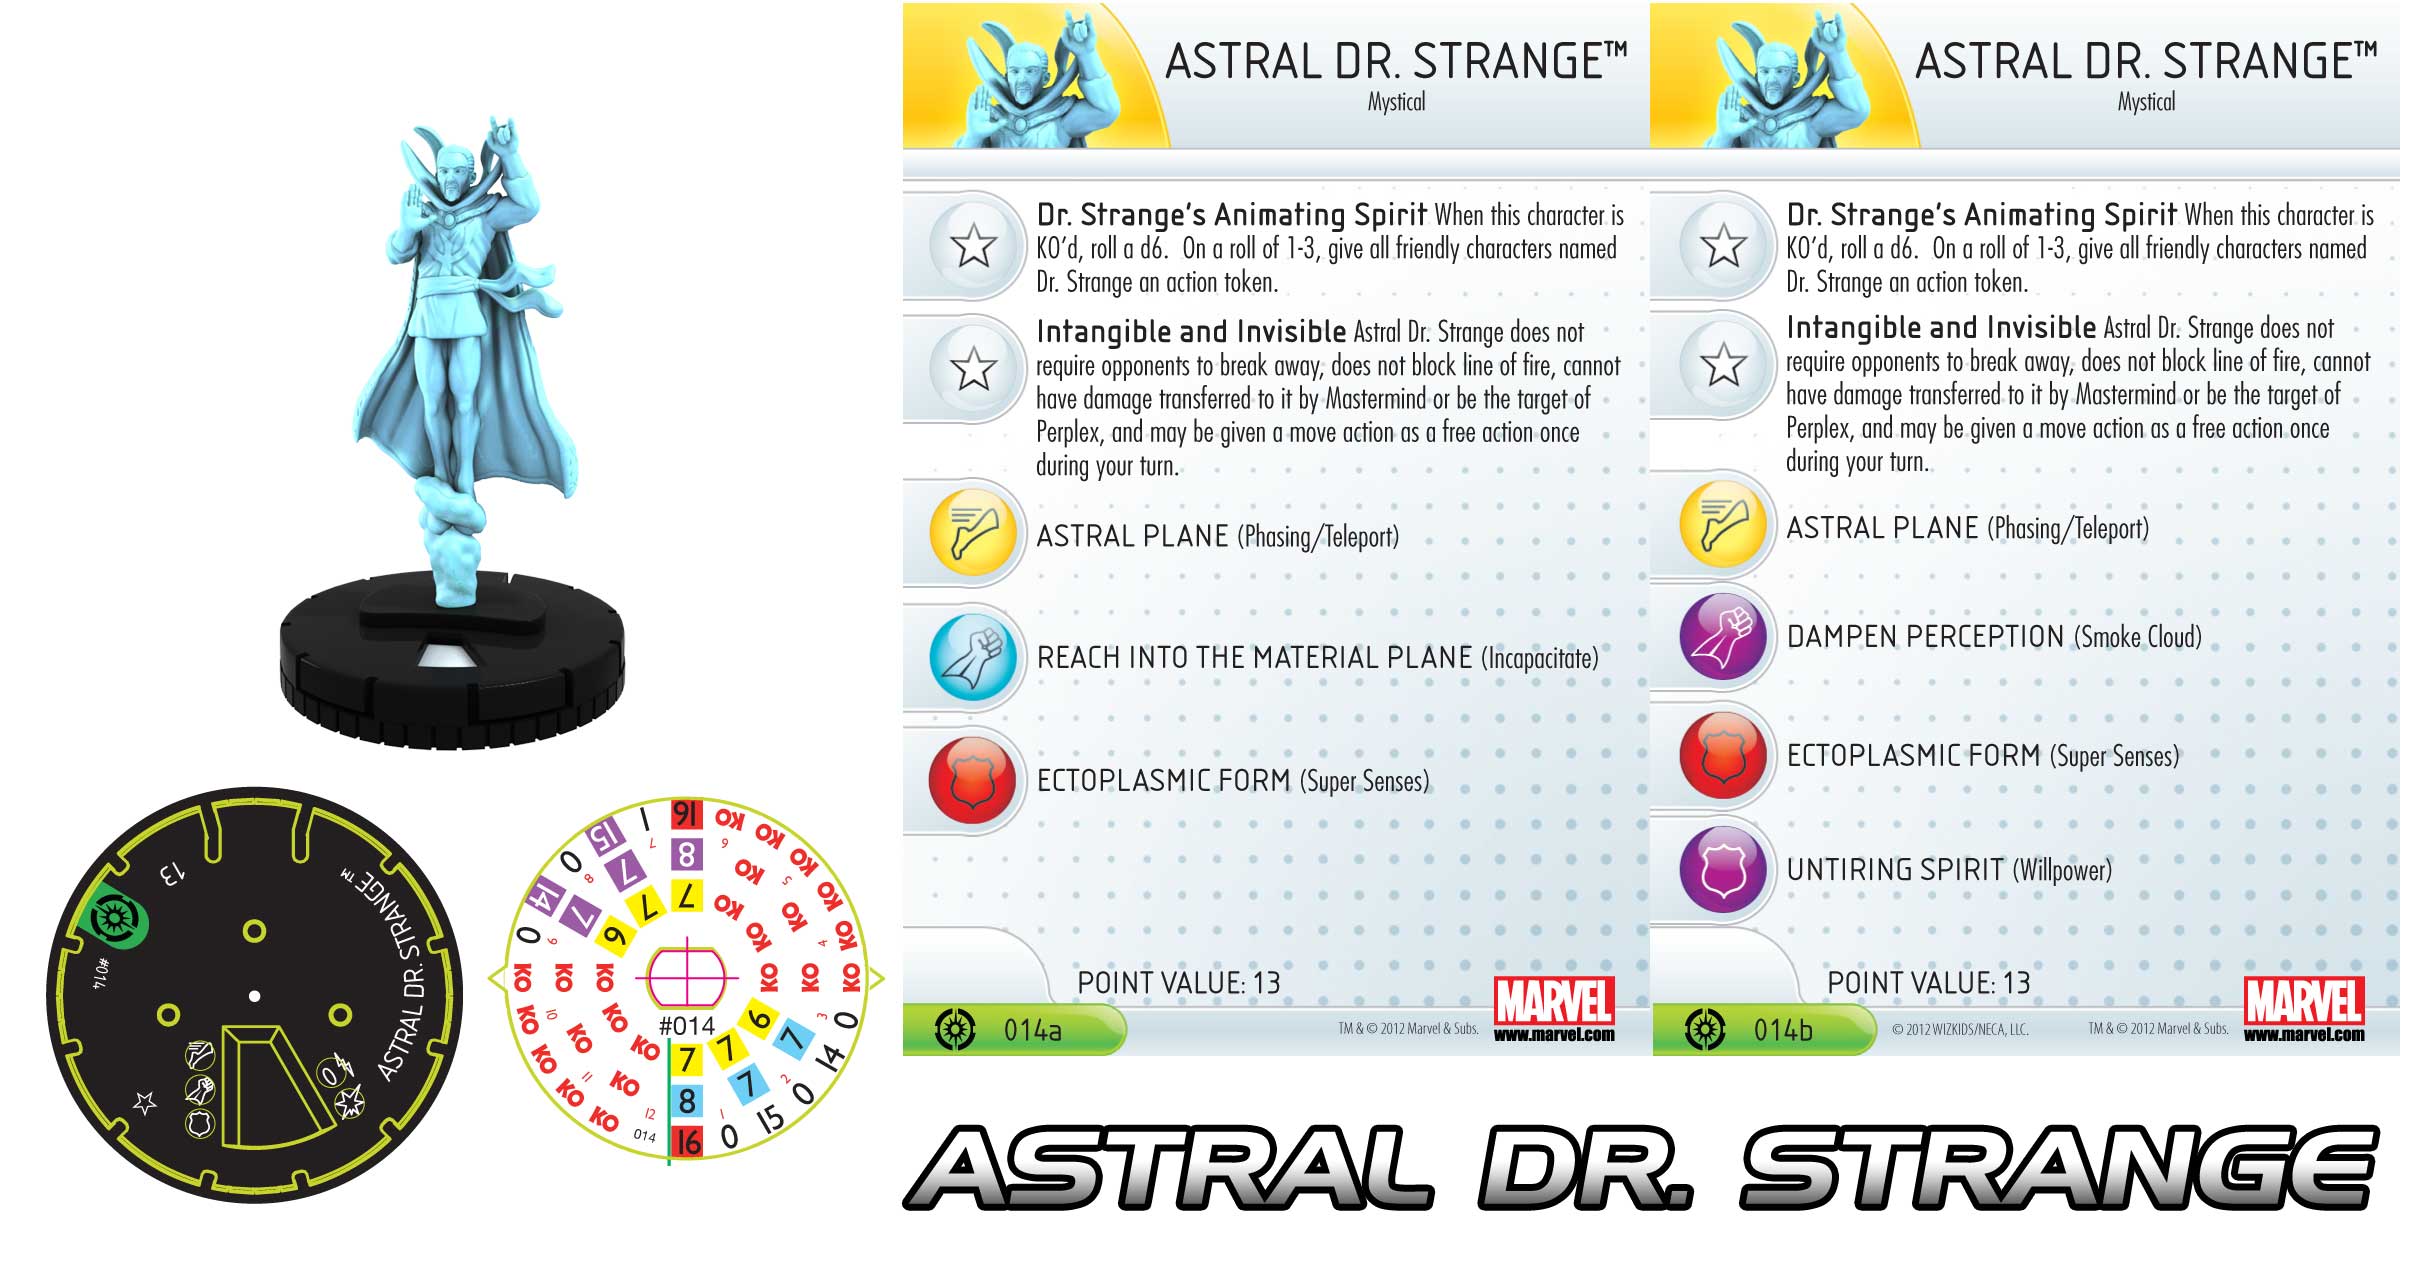
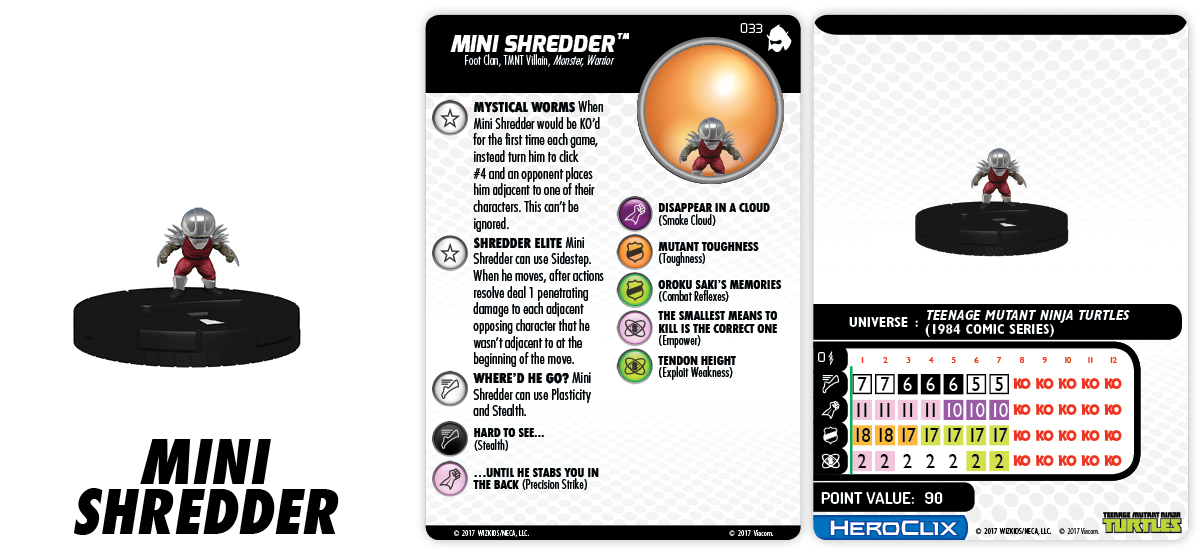
Mini-Nuke:
90 Mini Shredder
13 Astral Dr. Strange
Sometimes you just want to plop an annoying and disruptive figure right in the enemy’s camp, or even have the ability to get in for essentially free damage with minimal risk. This Shell allows either. On closed in maps with lots of walls or blocking it is entirely possible for Astral to Phase up for FREE carrying Mini Shredder, have Mini Shredder Sidestep while staying adjacent to Astral (dealing 1 pen) and then have Astral take a MOVE action to Phase on out of there back where it’s safe. On off turns (since you may not want to push him) you can still reposition as a FREE action with Astral carrying Mini.
Or, maybe you just want Mini up in their face from the get go, with both a FREE and regular move, Astral Taxi’s Mini Shredder around unnaturally effectively. While traditional Shredder-type builds have to commit to things like Overdrive, Astral is cheap, effective, and doesn’t require much in the way of investment of points or actions to make him a fantastic method of putting Mini Shredder right in the action.

Phantom Prison:
72 Phantom Girl
14 Utility Belt
Phantom Girl was quite strong during her tenure in Modern. As one of the few figures who specifically cares about resources it is possible for her to cripple opposing teams that rely too heavily on the efficient bonuses those resources can provide. By moving through opposing characters, she is able to prevent them from using resources or relics, this means no Hammers for book users, no Constructs for battery users, and if she manages to pass through a Quinjet, no Real-boys for them either. This alone makes her a solid contender in the format, however with the Utility Belt she can be downright filthy.
Phantom Girl has a special power that allows her to take a CLOSE action at  no cost after any MOVE action she takes. The Utility Belt can come equipped with Handcuffs. Handcuffs require a CLOSE action and a successful attack to use, but when they hit they can lock down an opposing character for at least one, and possibly multiple turns. Handcuffs prevent a character under their effect from taking any action except the POWER action the handcuffs themselves grant, which has the character roll a d6 and on a 4-6 end the effect. This means that in order for a cuffed character to take any other action they need to SPEND a non-free action just to get a 50-50 chance of ending the effect. Even worse the effect can stack, making it necessary to roll through multiple cuffs before doing anything meaningful again.
This allows Phantom Girl to phase through blocking and lock up your opponents best pieces and stop them. This alone would be worth mentioning, but the Belt has other secrets. While showing a pair of linked numbers, using one of those slots will allow the character to use the other linked slot at no cost. One of the items the Belt can be equipped with is the Grapnel Gun, which gives the character a MOVE action…
While showing a linked Grapnel and Handcuff, it is possible for Phantom Girl to MOVE, phasing through the opponents force, and attack with handcuffs on one of them. Using that handcuff triggers the link, allowing them to use Grapnel at no cost. Because Grapnel gives her a MOVE action, Phantom Girl will now get to take another CLOSE action at no cost, which can be one of her remaining handcuffs.
Even deadlier is that Grapnel itself can allow a CLOSE action if the character moves from a lower to higher elevation. If Phantom Girl’s initial Phase ends her on elevation 1 and she can make it to elevation 2 or greater during her Grapnel move, it is possible to use Handcuffs 3 times in the same action! (though this requires removing 3 of them from the belt).
Whether it’s stacking all 3 onto the opponent’s single most important figure and taking them out of the equation for at least 3 turns while also turning off all your opponent’s resources, or spreading it around in order to lock out their entire team, this can be utterly devastating. On two very particular clicks of the Utility Belt dial it is even possible to go one step further.
Click 19 shows the linked numbers 1 and 6, it also shows the number 6 in the Belt slot. (click 23 does basically the same thing but with 1 and 2 with 1 in the belt slot). The effect of the belt slot is that when you use an item in that slot it is not removed. This means if she is showing click 19 and has handcuffs in slot 6 and grapnel in slot 1 it is possible to get a fourth activation and also only remove the Grapnel from the belt.
The sequence goes like this:
Phantom Girl Phases, Moving through at least 1 opposing character. This triggers a CLOSE action, which she uses to Handcuff in slot 6, which is not removed (because 6 is showing in the belt icon slot).
Since she used slot 6, Phantom Girl gets to use Grapnel Gun in slot 1, which if moving to a higher Elevation lets her CLOSE at no cost, which she can use the cuff in slot 6 for (and it doesn’t remove it).
During that Grapnel Phantom Girl both took a MOVE action, and activated an item in slot 1. Since she Took a MOVE action she gets to CLOSE at no cost (which can be the cuff in slot 6), and since she used the item in slot 1 and there is a different item in slot 6 she gets to use that item at no cost (that item is the same handcuff which has not been removed, and again isn’t remove). That’s potentially 4 handcuff activations using only a single item slot up (since the handcuff in 6 is never removed).
Assuming the elevations worked out, it is possible to fit a Fifth activation in there, since instead of Phasing initially Phantom Girl could have lead with using a Grapnel located in slots 2-4, which would give a CLOSE as part of it, which could be used to attack with the Cuffs in slot 6. I have not yet found a way to get more than 5 handcuffs in a single action this way, but even so, this is all pretty impressive for just 86 points of a 300 point force!

Stop Right There!:
Preventing opponents from taking actions altogether isn’t the only way to mess with opponents. While a bit more expensive than the other shells, this one can do some truly obnoxious things to the opponent.
100 Thanosi
20 Splitlip
24+ Indigo Battery (with ring, net, wall minimum)
8 Black Light
8 Matter Rearranger
10 Millennium Puzzle
170 total
Thanosi has a peculiar trait, which prevents opponents from ignoring terrain for movement if they are in range. In other worlds all their various sources of Improved Movement other  than Characters don’t do anything. Combining this with ways to change the terrain allows Thanosi unparalleled ability to basically halt opponents in their tracks. Particularly if your team can make the opponent’s figures occupy clear terrain with matter re-arranger and then turn all the adjacent squares hindering or blocking. The battery itself gets you 4 squares worth of terrain as free actions with Net and Wall. Splitlip allows you to pick up relics as a free action and with better odds at getting them. With Black Light this team can get another 6 squares of Smoke Cloud as a free action (just make sure not to put it on the character you gave the net), the Matter Rearranger allows you either create permanent squares of blocking terrain, hindering, or water, or turn existing terrain into clear terrain if that is more useful. Finally the Millennium Puzzle grants Barrier with a twist. That twist is that you get to place 8 squares of it.
Together that’s 10-11 squares every turn as free actions, and another 8 any time you can give whoever has the Puzzle a power action. This alone might not be enough, since of course the opponent can just shoot you.
Or can they? This is where Indigo comes into the fold. With its spectrum bonus, the Indigo Battery causes all Lines of Fire from more then 4 away to be Blocked. This means that in order to shoot your pieces who join the corps the opponent will need to move within 4 squares of you…. However they won’t be able to ignore terrain once they are within 8 (or 10 if you also play a sniper rifle to give to Thanosi), and you can place a substantial amount of hindering around to stop them from ever getting that far.

Movin’ and Groovin:
This is actually a trio of possibilities that all do more or less the same thing, give out move actions to other characters.
50 FF Captain America
70 Alyosha Kraven
68 Lt. Gordon
All three figures can give others MOVEs, but have limitations based on keywords
It is possible to circumvent this however in a couple ways. Alyosha cares about Animals specifically, but TMNT gave us the wonderful Mutagen Ooze, which when equipped can make any character an animal. For 80 points to start, plus whatever standard character you want to advance during the game (and a power action to pick the ooze up), Alyosha can trigger MOVE actions on all sorts of characters that he ordinarily couldn’t.
FF America and Gordon, however, care about sharing keywords. To the rescue here is the various Lantern Batteries. It takes a couple turns to equip both Gordon (or Cap) and your other figure, but since characters with constructs get the keyword of the Ring you use, they will definitely share keywords as fellow Corps members. (you can speed this up by having one or both assigned the appropriate Possessor, requiring you to only have the other join the corps from the battery)
Juston Seyfert may be banned, but that doesn’t stop us from finding as close an approximation as possible!
Hopefully one or more of these Shells gives you an idea of powerful tactics you can pull off in ROC age, and hopefully I’ll see some of you using them in three weeks at Majestix!